Overview
Light is one of the most important cues for a seed to decide when to start growing. Research shows that different light spectra (e.g., LED vs. fluorescent) can speed up or slow down germination in many species[1][3]. While the colour and intensity of light are well studied, the direction from which light arrives – the lamp’s angle – is less often examined in elementary classrooms. This experiment lets children isolate the angle of illumination as the only variable and record how quickly seeds break dormancy.
Testable Question
Does changing the angle of a lamp affect the speed of seed germination?
Hypothesis
Because seeds receive more direct photons when the light source points straight at them, we predict that a lamp positioned at a steep (near‑vertical) angle will produce faster germination than a lamp placed at a shallow (near‑horizontal) angle.
Materials
- Seeds – 30 – 40 of the same species (e.g., radish, lettuce, or fast‑germinating beans). Use a single seed lot to avoid genetic variation.
- Paper towels (white, unbleached) – enough to line four 9‑cm petri dishes.
- Distilled or tap water – about 200 ml.
- Four small cardboard boxes (≈15 × 15 × 10 cm) – to create dark, insulated chambers.
- One desk lamp with an adjustable head (LED or fluorescent). The lamp should stay on for the entire observation period.
- Protractor or angle‑measuring app (smartphone) – to set lamp angles precisely.
- Masking tape or sticky notes – to label each treatment.
- Permanent marker.
- Ruler or caliper – for measuring seedling length (optional).
- Thermometer (optional) – to verify temperature stays similar across boxes.
Before You Begin
- Choose a quiet, draft‑free area where the lamp can stay on for several days without being moved.
- Gather an adult to help with any electrical connections and to ensure the lamp is stable.
- Make sure the workspace is clean and that any spilled water can be wiped up safely.
Variables and Controls
| Variable | What It Is | How It Is Kept Constant |
|---|---|---|
| Independent Variable | Lamp angle (degrees from the horizontal) | Three angles: 15°, 45°, 75°, plus a dark control (no light) |
| Dependent Variable | Germination speed – days until 50% of seeds have visible radicles | Measured daily; same definition for all groups |
| Controlled Variables | Light intensity at seed surface, temperature, moisture, seed species, seed lot, container size, and observation schedule | Use a light meter or equal‑distance placement to match intensity; keep boxes in the same room; add the same amount of water to each dish; use identical paper towels and containers. |
Steps (Procedure)
- Prepare the germination dishes. Fold a paper towel to fit each petri dish, moisten it with 5 ml of water, and gently squeeze out excess so the towel is damp but not pooling.
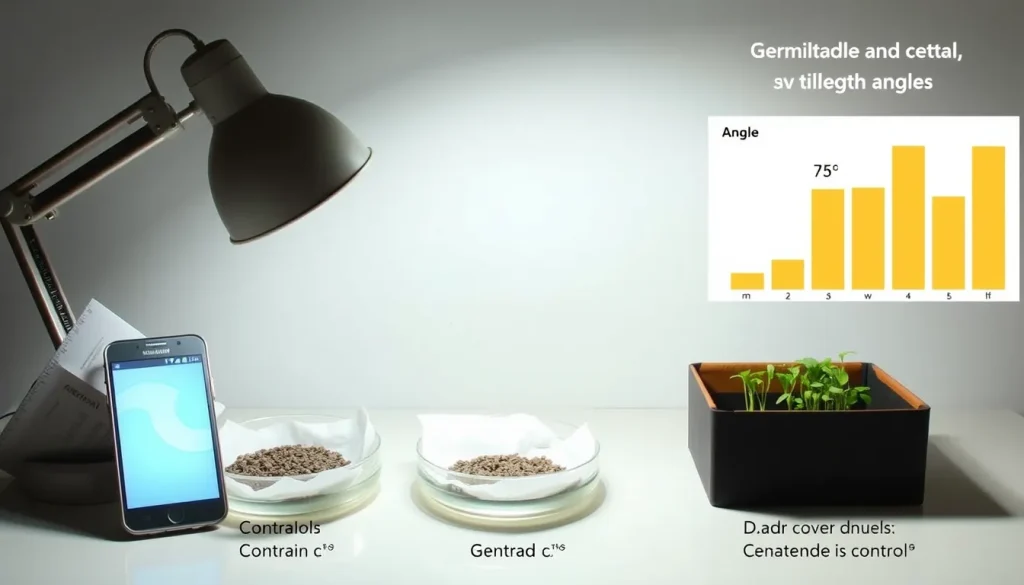
- Place seeds. Distribute an equal number of seeds (e.g., 8–10) evenly across the damp towel in each dish. Label the dishes “15°”, “45°”, “75°”, and “Dark”.
- Set up the lamp. Position the lamp on a stable stand so its head can be tilted. Measure the distance from the lamp bulb to the seed surface (e.g., 30 cm) and keep this distance the same for all angles.</n
- Use the protractor to set the lamp head at 15° from the horizontal (shallow).
- Secure the angle with a small wedge of cardboard or a book.
- Create the three light treatments. Place the “15°” dish directly under the lamp set at 15°. Then, repeat the same distance for the “45°” and “75°” dishes, adjusting the lamp head each time. For the “Dark” dish, cover the cardboard box with a dark cloth or place it inside a closed box to block all light.
- Turn the lamp on. Keep it on continuously for the duration of the experiment (typically 7‑10 days). If the lamp generates heat, monitor temperature; aim for 20‑25 °C across all boxes.
- Record daily observations. Each morning, check each dish and count how many seeds have produced a visible radicle (the first root). Note the date, the number of germinated seeds, and any abnormal growth.
- Maintain moisture. If the paper towel looks dry, add a drop of water with a pipette. Do this at the same time each day for all dishes.
- Stop the trial. After 10 days, or when all viable seeds have germinated, record the final counts and calculate the day on which each dish reached 50 % germination.
Repeated Trials
To see whether the pattern holds, repeat the whole setup at least once more using a fresh seed lot. Multiple trials reveal natural variation and give more confidence in the conclusion.

What to Observe or Measure
- Germination speed – the number of days needed for 50 % of the seeds in a dish to show a radicle.
- Final germination percentage – total seeds germinated after the observation period.
- Seedling length (optional) – measure the length of the radicle with a ruler to see if angle also influences early growth vigor.
Data Table
| Day | 15° (germinated) | 45° (germinated) | 75° (germinated) | Dark (germinated) |
|---|---|---|---|---|
| 1 | ||||
| 2 | ||||
| 3 | ||||
| 4 | ||||
| 5 | ||||
| 6 | ||||
| 7 | ||||
| 8 | ||||
| 9 | ||||
| 10 |
Fill in the blanks each morning. After the trial, calculate the “days to 50 % germination” for each angle.
Graphing Your Results
Create a simple bar graph: the x‑axis lists the four treatments (15°, 45°, 75°, Dark) and the y‑axis shows “Days to 50 % germination”. Lower bars indicate faster germination. If you performed multiple trials, plot the average and add error bars to show variation.
The Science Explained
Seeds contain photoreceptors (phytochromes and cryptochromes) that sense red/far‑red and blue light. When photons strike the seed surface, the receptors trigger hormonal changes that break dormancy. Most studies compare light colour or intensity[1][3]. The angle of light changes two key factors:
- Photon distribution. A steep angle delivers light more directly onto the seed coat, increasing the number of photons absorbed per unit time. A shallow angle spreads the light over a larger area, effectively lowering the dose each seed receives.
- Shadows and self‑ shading. In a shallow configuration, seeds can cast tiny shadows on each other, reducing the light each seed actually receives.
Both effects can slow the biochemical cascade that leads to radicle emergence, which is why we expect a faster germination rate at higher angles. The dark control demonstrates that without light, many seeds either stay dormant or germinate much more slowly, confirming the essential role of light.
Troubleshooting
- Unequal light intensity. If a light meter shows a big difference between angles, adjust the distance so that the measured lux is the same for each dish.
- Over‑dry paper towels. Seeds will not germinate if they dry out. Check moisture daily and add water uniformly.
- Temperature spikes. Lamps can warm the air. If the temperature in one box rises above 28 °C, move the lamp farther away or use a fan to equalize.
- Contamination. Fungal growth can kill seedlings. Use clean paper towels and work with dry hands; discard any dish that shows mold.
Cleanup and Disposal
After the experiment, compost the germinated seedlings if you have a garden, or discard them in the trash. Recycle the cardboard boxes and paper towels if your local program accepts them. Turn off and unplug the lamp, then store it safely for future projects.
Next Steps
Once the angle effect is understood, children can explore related questions: Does lamp distance (intensity) interact with angle? How do different seed species respond? Or, turn the project into an engineering challenge by designing a simple rotating lamp that automatically adjusts angle throughout the day.
Related terms
- Phototropism
- The growth movement of plants toward or away from a light source.
- Germination
- The process by which a seed resumes metabolic activity and begins to grow a new plant.
- Photon
- A particle of light; seeds need photons to trigger biochemical changes that break dormancy.
Sources & references
- Sanoubar, R., Calone, R., Noli, E., & Barbanti, L. (2018). Data on seed germination using LED versus fluorescent light under growth chamber conditions. Data in Brief, 19, 594–600. https://pmc.ncbi.nlm.nih.gov/articles/PMC5997879/
- Kamath, D., Kong, Y., Dayboll, C., Blom, T. J., & Zheng, Y. (2021). Seed germination responses to low-level narrow-band light spectra for 14 ornamental plant genotypes. Canadian Journal of Plant Science, 101(4), 485–497. https://doi.org/10.1139/cjps-2020-0330