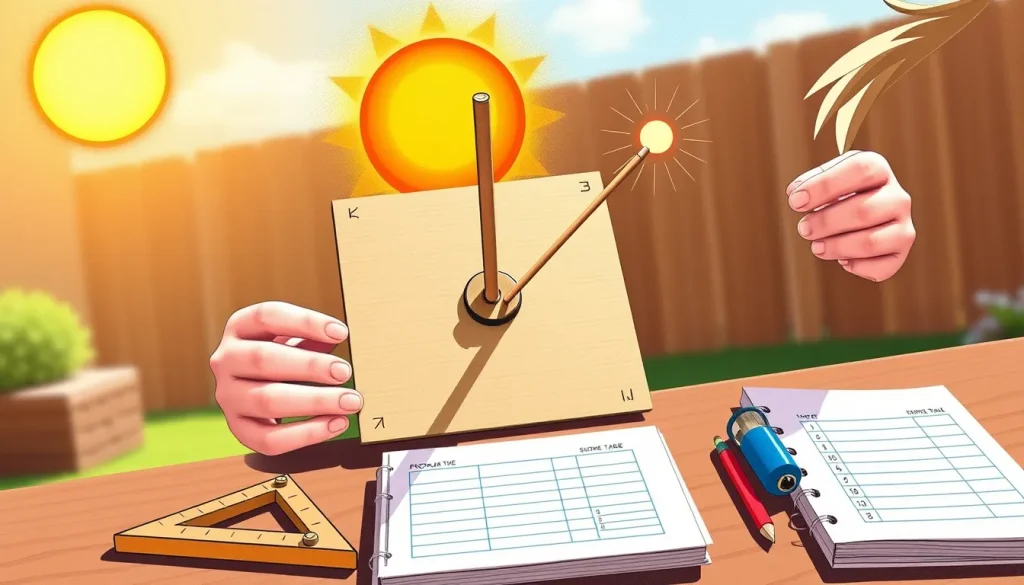
This activity is an engineering challenge for ages 6‑14. Using only cardboard, paper, a stick, a compass, a protractor (or a watch), and simple fasteners, families construct a device that rotates to keep a vertical stick facing the Sun directly. The project teaches how the Sun appears to move across the sky, why a surface perpendicular to sunlight receives the most energy, and how to iterate a design based on measured performance.
Before You Begin
- Choose a sunny, open area where the Sun’s path is unobstructed for most of the day (e.g., a backyard or schoolyard).
- Set aside about 45 minutes for construction and another 30 minutes for initial testing.
- An adult should supervise the cutting of cardboard and the use of any sharp tools.
- Bring a notebook, a pencil, and a simple timer (smartphone or watch) for recording observations.
Materials
- Stiff cardboard (e.g., a shipping box) – one large sheet about 30 cm × 40 cm.
- Heavy‑weight paper or cardstock – a few sheets for recording data.
- Wooden dowel or craft stick (≈30 cm long) – will serve as the “sun‑facing” pointer.
- Paper fastener (brad) – one, for the central pivot.
- Compass – for finding true north.
- Protractor or an analog watch (hour hand as a simple angle guide).
- Scissors or a utility knife (adult only).
- Rubber bands or small weights (optional, to stabilize the base in wind).
- Glue or tape – for reinforcing joints.
Steps
- Cut the base. From the cardboard, cut a rectangle about 30 cm × 30 cm. This will be the stationary base.
- Create the rotating arm. Cut a second piece of cardboard into a narrow strip (≈5 cm × 25 cm). This strip will hold the stick and rotate around the base.
- Make the pivot. Punch a small hole near the middle of the base (use a thin nail or awl). Insert the paper fastener so the shaft is perpendicular to the base. The rotating arm should slide over the fastener shaft and be able to swivel freely.
- Attach the stick. Glue the wooden dowel vertically to the center of the rotating arm, pointing upward. The dowel should be as close to perpendicular to the arm as possible.
- Balance the arm. Flip the rotating arm over the fastener so it can turn in either direction. If the arm tilts, add a small piece of tape on the opposite side to balance it.
- Mark the reference line. Using the protractor, draw a line on the base that points toward true north (determined with the compass). This line will be the zero‑degree reference for azimuth.
- Secure the device. Place the base on a flat surface. If wind is expected, weigh the base down with small rocks or attach rubber bands to a nearby stake.
- Initial calibration. At solar noon (when the Sun is highest), adjust the rotating arm manually so the stick points directly at the Sun. Note the arm’s position relative to the north line – this is the “baseline” for later measurements.
- Record observations. Every hour from sunrise to sunset, note the angle you need to turn the arm to keep the stick aiming at the Sun. Use the protractor to measure the angle between the arm and the north line (azimuth) and the tilt of the stick relative to vertical (altitude). Record the time, temperature, and any wind conditions.
- Iterate. If the stick drifts noticeably between recordings, modify the pivot friction (add a tiny dab of wax for smoother motion or a thin piece of rubber for more grip) and repeat the hourly checks.
Design Constraints and Success Criteria
- Constraint 1 – Materials. Only cardboard, paper, a stick, a fastener, and basic classroom tools may be used.
- Constraint 2 – Mobility. The device must be portable enough for a single child to move it.
- Success Criterion 1. The stick remains within ±5° of perpendicular to the Sun’s rays throughout the day.
- Success Criterion 2. The rotating arm can be adjusted without tools after the initial build.
- Success Criterion 3. The recorded angle data shows a smooth, predictable change that matches the Sun’s known path (approximately 15° of azimuth per hour).
What to Observe or Measure
Use the table below to log each observation. The key measurements are:
| Time (hh:mm) | Azimuth angle (° from north) | Stick tilt from vertical (°) | Weather notes |
|---|
After the day is complete, plot azimuth versus time to see the Sun’s apparent motion. The stick tilt should roughly follow the Sun’s altitude curve (low in the morning, highest at noon, low again in the evening).
The Science Explained
The Sun appears to move across the sky because Earth rotates once every 24 hours. From any fixed point on Earth, the Sun rises in the east, climbs to its highest point (solar noon), and sets in the west. The angle between a surface and the incoming sunlight is called the angle of incidence. When a surface is perpendicular (90°) to the Sun’s rays, the angle of incidence is 0°, and the surface receives the maximum possible solar energy. Solar panels, solar ovens, and even plants benefit from this alignment.

Our cardboard tracker mimics a simple single‑axis solar tracker. By rotating the arm around a vertical axis, we keep the stick (standing in for a solar panel) aimed directly at the Sun as the Sun’s azimuth changes. The experiment demonstrates two key concepts:
- Azimuth. The compass direction of the Sun measured clockwise from true north. The Sun moves about 15° of azimuth each hour (360°/24 h).
- Altitude (elevation). The angle of the Sun above the horizon. While our single‑axis tracker cannot change altitude, the stick’s tilt relative to vertical gives a visual cue of this angle.
Because the device relies on manual adjustment, it also illustrates the importance of low‑friction pivots and stable bases—core engineering considerations for real solar‑tracking systems, which often use motors and light sensors to automate the process [4].
Troubleshooting
- Arm won’t turn smoothly. The fastener may be too tight. Gently loosen the brad or add a small piece of wax to the shaft.
- Stick drifts away between recordings. Wind can push the arm. Add weight to the base or use a windbreak (e.g., a cardboard shield).
- Measurements are inconsistent. Ensure the protractor is aligned with the north line each time; re‑check the compass for magnetic declination errors.
- Device tips over. Verify the base is flat and place it on a stable surface. Use rubber bands or a stake if the ground is soft.
Extensions and Next Steps
- Build a dual‑axis tracker by adding a second pivot that tilts the stick up and down, matching the Sun’s altitude.
- Replace manual turning with an Arduino‑controlled servo that uses two light‑dependent resistors (LDRs) to keep the arm centered automatically.
- Compare the energy output of a small solar cell mounted on the tracker versus a fixed panel (see the mini‑solar panel lesson [2]).
- Document how the tracker’s performance changes with season (the Sun’s path is higher in summer, lower in winter).
Cleanup and Storage
Disassemble the device by removing the fastener. Flatten the cardboard pieces for reuse or recycle them. Store the stick and fastener in a small zip‑lock bag for future projects.
Related terms
- Azimuth
- The compass direction of an object measured clockwise from true north.
- Altitude (elevation)
- The angle of an object above the horizon.
- Solar tracker
- A device that orients a solar panel so it stays perpendicular to sunlight as the Sun moves.
Sources & references
- SunTracker • SunWind Solar, https://sunwindsolar.com/solar-lesson-ideas/suntracker/
- Positioning Solar Panels I: Explorations with Tracking, https://www.nyserda.ny.gov/-/media/Project/Nyserda/Files/EEWD/Schools/Solar-Lessons-For-Students/SUN-k12-SKL7-positioningsolarpanels-1.pdf
- Solar Tracker Arduino Project – Clean Energy Institute, https://www.cei.washington.edu/lesson-plans-resources/solar-tracker-arduino-project/