Overview
This activity is an engineering challenge in which children design, build, and test a solar oven made from a pizza‑box‑style cardboard container. The goal is to melt a piece of chocolate (or a marshmallow) using only sunlight, reflective surfaces, and a simple insulating layer. By repeating the build and testing cycle, learners experience the full engineering design process: define the problem, generate ideas, create prototypes, test, evaluate, and improve.
Before You Begin
- Location: Choose a sunny outdoor spot on a clear day. The sun should be high enough (roughly 45°–70° elevation) to provide strong direct radiation.
- Timing: Allocate about 30 minutes for set‑up, 15–30 minutes for testing, and additional time for redesign if desired.
- Adult Supervision: An adult should help with cutting cardboard, handling scissors or utility knives, and supervising any use of hot chocolate after melting.
- Safety: Wear safety glasses when cutting, and handle the hot chocolate with a spoon or spatula. The oven itself can become warm (up to 80 °C) but will not reach boiling temperatures.
Materials
- One large pizza‑box (approximately 12 × 12 × 2 inches) – the primary structure.
- Aluminum foil (several feet) – reflective interior surface.
- Black construction paper (1 sheet, 12 × 12 in) – absorbs heat.
- Clear plastic wrap (or a large clear zip‑lock bag) – creates a greenhouse effect.
- Newspaper (several sheets) – insulation.
- Masking tape or packing tape.
- Scissors or a utility knife.
- Ruler or straight edge.
- Thermometer (range 0 °C–100 °C) – optional but recommended for quantitative data.
- Chocolate squares or mini‑marshmallows for the test payload.
All items are inexpensive and found in most homes or can be collected from a pizza order.
Design Constraints and Success Criteria
Before building, write down the constraints that the oven must meet and how you will judge success.
- Size Constraint: The oven must fit inside the original pizza box; no additional external frames.
- Material Constraint: Only the materials listed above may be used.
- Performance Goal: The oven should raise the temperature inside the cooking chamber by at least 5 °C within 5 minutes of direct sunshine, as suggested by NASA’s solar‑oven lesson [1].
- Success Metric: Chocolate (≈10 g) must become fully melted (visually liquid) within 15 minutes of exposure.
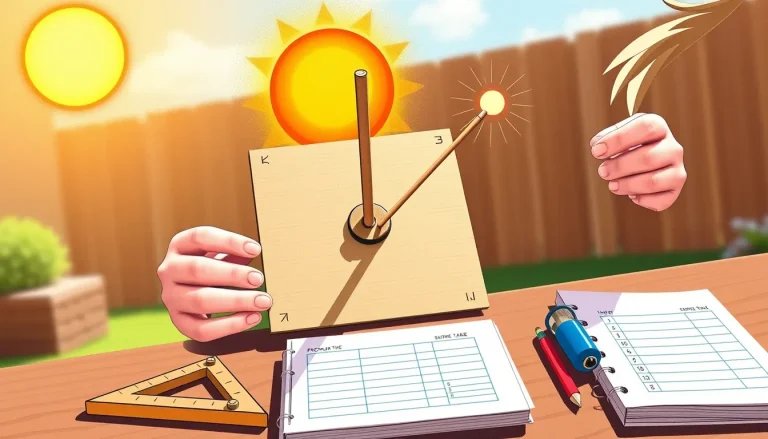
- Documentation: Record start time, ambient temperature, oven temperature (if using a thermometer), and the time when the chocolate is fully melted.
Build Steps
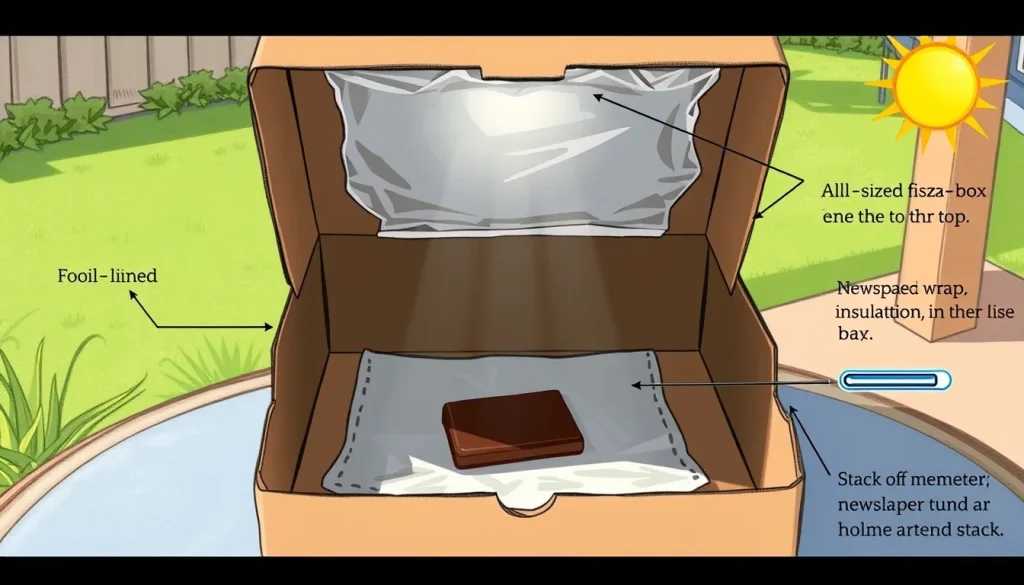
- Prepare the Box: Using scissors, cut a flap along the top edge of the pizza box, leaving about 1 inch of cardboard attached on the back side. Fold the flap outward to create a lid that can be angled toward the sun.
- Line the Interior with Foil: Cover the inner side of the flap and the inside walls of the box with aluminum foil, shiny side up. Smooth it with your hand to minimize wrinkles; secure with tape.
- Add the Black Base: Cut the black construction paper to fit the bottom of the box. Tape it flat; this surface will absorb solar energy.
- Insulate the Sides: Crumple newspaper and line the sides and top edge of the box (under the foil). This trapped air reduces heat loss.
- Create the Transparent Cover: Stretch clear plastic wrap over the open top of the box, sealing the edges with tape. The plastic should be taut like a greenhouse window.
- Place the Test Payload: Put the chocolate square on the black base, optionally on a small piece of foil to keep it flat.
- Angle the Reflector: Prop the foil‑covered flap up with a small stick or a rolled piece of newspaper so that it reflects sunlight into the box. Adjust the angle until the brightest spot of reflected light falls on the chocolate.
- Start Timing: Record the ambient temperature, start the stopwatch, and note the angle of the flap.
- Monitor Temperature: If using a thermometer, place it on the black base (away from the chocolate) and record the temperature every 2 minutes.
- Observe Melting: Watch the chocolate. When it becomes a smooth liquid, note the elapsed time.
- Iterate: If the chocolate did not melt, modify one variable (e.g., increase the flap angle, add extra insulation, or use a larger foil reflector) and repeat the test.
What to Observe and Measure
- Qualitative: Color change of chocolate, presence of bubbles, and any visible steam.
- Quantitative: Time to melt (seconds), interior temperature (°C) at each interval, and angle of the reflective flap (degrees, if a protractor is available).
Use the table below to record data for each trial.

| Trial | Flap Angle (°) | Ambient Temp (°C) | Start Time | Temp @ 2 min (°C) | Temp @ 4 min (°C) | Melting Time (s) | Notes / Changes |
|---|---|---|---|---|---|---|---|
| 1 | |||||||
| 2 | |||||||
| 3 |
The Science Explained
Solar ovens convert light energy from the sun into heat energy through two main processes:
- Absorption: Dark surfaces (the black construction paper) absorb most of the incident sunlight and convert it into thermal energy.
- Greenhouse Effect: The clear plastic wrap is transparent to visible light but traps infrared radiation emitted by the heated interior, preventing heat from escaping. This raises the temperature inside the sealed space.
Aluminum foil acts as a reflector, redirecting sunlight that would otherwise miss the box toward the cooking chamber, increasing the amount of energy captured. The crumpled newspaper provides insulation by trapping still air, which has low thermal conductivity, reducing heat loss to the environment.
Because the oven has no active heating elements, its maximum temperature is limited by the intensity of solar radiation (about 1000 W m⁻² on a clear day) and the efficiency of the reflective and insulating components. NASA’s lesson notes that a modest solar oven can raise its interior temperature by at least 5 °C in five minutes, which is sufficient to soften chocolate (< 30 °C melting point) and melt marshmallows quickly enough for a s’mores demonstration [1].
Troubleshooting
- Chocolate does not melt after 15 minutes:
- Check that the foil reflector is angled correctly; the brightest spot should be directly on the chocolate.
- Ensure the plastic wrap is sealed tightly; gaps let warm air escape.
- Add more newspaper insulation or a second layer of foil on the interior walls.
- Oven interior stays cool:
- Make sure the black paper is fully covering the base; any exposed cardboard reflects rather than absorbs.
- Move the oven to a location with direct, unobstructed sunlight.
- Plastic wrap melts or becomes cloudy:
- Use a thin, high‑quality kitchen wrap or a clear zip‑lock bag; avoid low‑grade plastic that degrades at ~70 °C.
Extensions and Next Steps
Once the basic oven reliably melts chocolate, consider these extensions to deepen learning:
- Variable Test: Systematically vary one design element (e.g., number of foil layers) and plot temperature versus time to see the quantitative effect.
- Alternative Payloads: Try melting cheese, heating water, or baking a tiny cookie to explore different heat capacities.
- Design Challenge: Redesign the oven to be portable (e.g., foldable) while maintaining the same melting performance.
- Cross‑Curricular Links: Connect the activity to a lesson on energy conversion, the water cycle (solar heating), or the engineering design process used by NASA for lunar habitats [1].
Cleanup and Disposal
Re‑use the cardboard box for future projects or recycle it. Remove and recycle the aluminum foil, plastic wrap, and newspaper. Store any leftover chocolate in a sealed container. Dispose of any broken or torn plastic according to local recycling guidelines.
Conclusion
This cardboard solar oven challenge gives children a hands‑on experience with renewable energy, heat transfer, and the iterative nature of engineering. By setting clear constraints, measuring outcomes, and refining the design, learners develop problem‑solving confidence while having fun watching chocolate melt in the sun.
Sources & references
- NASA – Cooking with the Sun: Build a Solar Oven Design Challenge (https://www.nasa.gov/wp-content/uploads/2024/02/nasa-lp-solar-oven.pdf?emrc=66f923)
- U.S. Department of Energy – Build a Pizza Box Solar Oven (https://www1.eere.energy.gov/education/pdfs/lesson298.pdf)
- Energy Alabama – STEAM Experiment: Engineering a Solar Oven (https://energyalabama.org/knowledge-center/steam-experiment-engineering-a-solar-oven/)
- DiscoverE – Solar Power Up! (https://discovere.org/engineering-activities/solar-power-up/)