Overview
Light pollution is the artificial brightening of the night sky caused by streetlights, buildings, and other human‑made sources. It hides stars, disrupts wildlife, and even affects human health. Measuring how bright the sky is at a given place lets families see the impact of local lighting and contributes data to citizen‑science projects.[2] While professional sky‑quality meters (SQMs) are expensive, recent research shows that a smartphone’s camera can serve as a low‑cost photometer when properly calibrated.[1]
Before You Begin
- Choose a dark night. A clear, moonless (or thin‑crescent) night gives the most reliable baseline. If you use the Moon for calibration, note its phase and altitude.
- Find a safe, open site. Parks, backyards, or school fields away from direct streetlights work well. Avoid trees, fences, or building walls that can reflect light into the camera.
- Prepare the smartphone. Charge the device fully, disable any automatic brightness or exposure settings, and install a dedicated light‑pollution app (e.g., Light‑Pollution‑Meter for Android). The app handles the necessary camera controls.
- Gather a simple record‑keeping tool. A notebook, spreadsheet, or printed data table will be used to log each measurement.
Materials
- Smartphone (Android or iOS). Android users can download the open‑source Light‑Pollution‑Meter app.[1]
- Optional: Small tripod or stable surface to keep the phone steady.
- Notebook or printable data table (provided below).
- Clear sky map or a star‑finding app to select an empty patch of sky (e.g., Stellarium).
- Pen or pencil.
Step‑by‑Step Procedure
- Install and open the app. Follow the on‑screen prompts until you reach the main measurement screen.
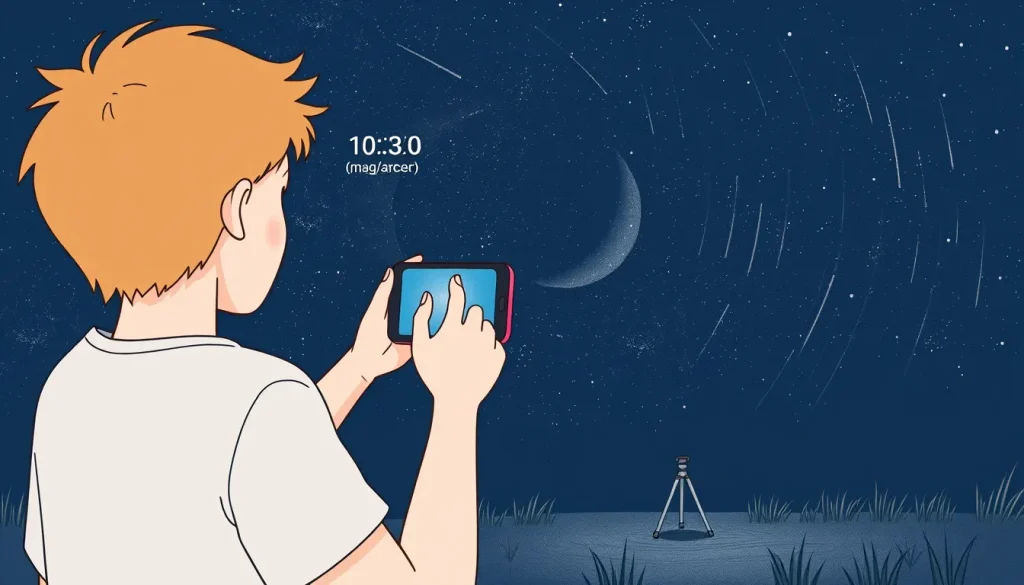
- Calibrate the zero point using the Moon. Point the camera at the Moon when it is above 30° altitude. The app records the Moon’s known brightness and calculates a zero‑point correction for that phone model. This step compensates for differences between smartphone sensors.[1]
- Select a measurement direction. Using a star chart, locate a region of the sky that is free of bright stars, the Milky Way, and the Moon. Aim the phone’s camera at the centre of that patch.
- Take the reading. Press the measurement button. The app records the sky brightness in magnitudes per square arcsecond (mag/arcsec²) and displays the value.
- Record the data. Write down the following items:
- Date and time (24‑hour format).
- Location (address or GPS coordinates).
- Measured SQM value.
- Moon phase and altitude (if the Moon was visible).
- Cloud cover (clear, thin clouds, overcast).
- Any nearby artificial lights (e.g., streetlamp 10 m away).
- Repeat. For a useful dataset, repeat the measurement at the same spot on different nights and at several distances from the nearest city. Keep the phone orientation and camera settings identical for each trial.
What to Observe or Measure
The primary quantitative result is the SQM value, expressed in magnitudes per square arcsecond (mag/arcsec²). Higher numbers indicate a darker sky; a value of 22 mag/arcsec² is near the natural dark‑sky limit, while 16 mag/arcsec² corresponds to a brightly lit city centre.[3]
Qualitative observations are also valuable: note whether the sky appears hazy, if there are visible light domes near the horizon, and any sudden changes (e.g., a passing car’s headlights).
Data Table (Blank)
| Date | Time (UTC) | Location | SQM (mag/arcsec²) | Moon Phase / Altitude | Cloud Cover | Nearby Light Sources |
|---|---|---|---|---|---|---|
The Science Explained
Astronomers use the magnitude scale to describe how bright an object appears. A difference of 5 magnitudes corresponds to a factor of 100 in brightness; each magnitude step is a factor of about 2.512.[3] When we speak of sky brightness in mag/arcsec², we are measuring the amount of light that falls on a one‑arcsecond‑by‑one‑arcsecond patch of sky.

A smartphone camera sensor converts incoming photons into an electronic signal. The raw signal is proportional to the light intensity, but manufacturers apply a non‑linear “gamma correction” to make photos look natural to the eye. This gamma curve distorts the linear relationship needed for photometry, which is why a calibration step (using the Moon or a known light source) is essential.[1]
The Moon is an excellent calibration reference because its absolute brightness is well known for any phase and altitude. By measuring the Moon with the same phone, the app derives a correction factor that translates future raw sensor values into true sky‑brightness units.
While smartphone‑based meters are less precise than dedicated SQM devices, studies have shown they can achieve repeatability within ±0.3 mag/arcsec² when the calibration is performed correctly. This level of accuracy is sufficient for educational investigations and for contributing to citizen‑science databases.[1]
Troubleshooting
- Reading is unusually bright (low mag value). Check that the phone’s auto‑exposure is disabled; the app should force a fixed exposure. If the screen shows a warning, restart the app and repeat the calibration.
- Reading is unusually dark (high mag value) on a cloudy night. Clouds scatter city lights upward, making the sky brighter. Record the cloud condition; you may need to wait for a clearer night.
- Moon not visible for calibration. Use a bright, well‑characterized artificial source (e.g., a white LED with known luminous intensity) and enter its value manually if the app allows it.
- Phone shakes during measurement. Use a tripod or place the phone on a steady surface. Even slight movement can change the exposure time and affect the result.
- App reports error “gamma correction not accounted for.” This indicates the phone model is known to have strong non‑linear processing. Try a different device or update the app to the latest version.
Graphing Your Results (Optional)
Plotting SQM values against distance from the city centre visualises how light pollution falls off with distance. Use a simple scatter plot:
- X‑axis: Distance from city centre (kilometres).
- Y‑axis: SQM value (mag/arcsec²).
- Each point represents one night’s measurement.
Fit a trend line to see the general decline in brightness. Compare your curve with published sky‑quality maps to discuss discrepancies.
Next Steps
After collecting a set of measurements, families can:
- Submit data to the Dark Sky network as a citizen‑science contribution.
- Compare results with nearby professional SQM stations (many are listed on the International Dark‑Sky Association website).
- Design a simple engineering challenge: create a shield or shielded lamp that reduces local sky brightness, then measure the improvement with the same smartphone method.
Through repeated observations, children learn how quantitative data, calibration, and careful recording turn everyday devices into useful scientific instruments.
Related terms
- Light pollution
- Artificial brightening of the night sky caused by outdoor lighting, which reduces visibility of stars.
- Magnitude
- A logarithmic scale used by astronomers where larger numbers mean fainter objects; each step is about 2.5 times less bright.
- Arcsecond
- A unit of angular measurement equal to 1/3600 of a degree, used to describe tiny patches of sky.
- Photometer
- An instrument that measures the intensity of light, often used to quantify sky brightness.
Sources & references
- Light‑Pollution‑Meter GitHub repository, https://github.com/jeqcho/Light-Pollution-Meter
- Dark Sky International – Measuring light pollution, https://darksky.org/get-involved/measuring-light-pollution/
- Dark Sky Meter Pro – User manual, https://www.darkskymeter.com/manual.html
- DIY Photometer for Night Sky Brightness – Earth & Space Laboratory, https://doi.org/10.12928/jrkpf.v9i2.167