Overview
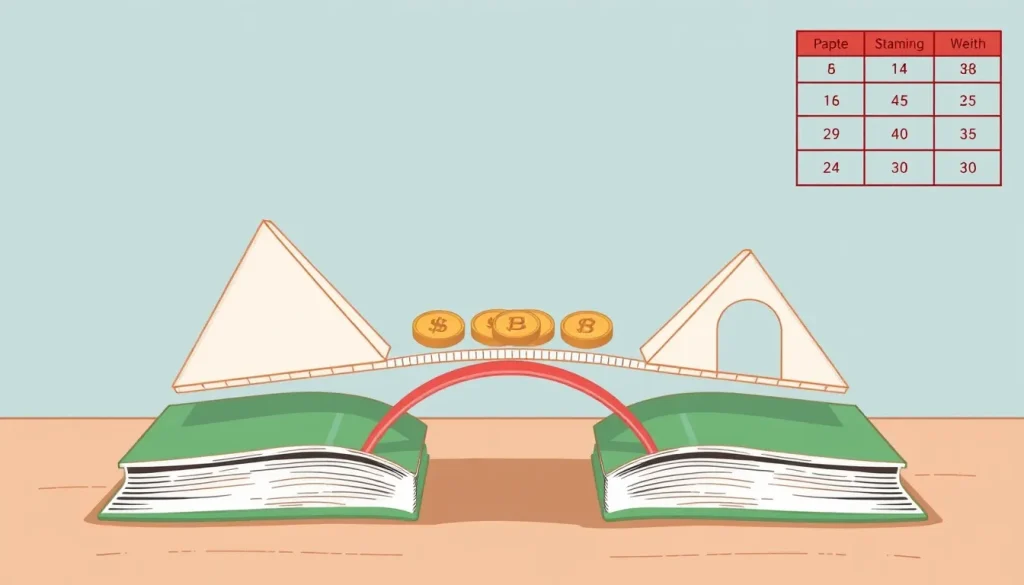
This activity lets children design, build, and test three paper‑bridge shapes—triangle, square, and arch—to see which one can support the greatest load. The task combines hands‑on construction with simple data collection, so learners experience how engineers use geometry to make structures strong.
Materials
- Standard printer paper (8.5″ × 11″, 1‑sheet per bridge)
- Masking tape or clear scotch tape (about 1 m total)
- Two sturdy books, boxes, or wooden blocks of equal height to act as supports (minimum 8‑inch span)
- Coins, small washers, or metal nuts for weights (at least 30 g total per bridge)
- Ruler (15 cm or longer)
- Pen or pencil for marking and recording
- Sheet of paper for data table (or a notebook)
All items are common household or classroom supplies. If masking tape is unavailable, any low‑stretch adhesive tape works.
Before You Begin
Set up a clear workspace on a table that is at least 2 feet long. Place the two supports about 8 inches apart; keep the distance the same for every bridge. Have an adult help with cutting tape and handling any sharp objects.
Design Constraints and Success Criteria
- Constraint: Each bridge must be made from a single sheet of paper and tape only. No additional stiffeners (cardboard, glue, or staples) are allowed.
- Success criteria:
- The bridge spans the gap without sagging before any weight is added.
- It holds the greatest weight possible before the paper tears or collapses.
- All three shapes are built using the same amount of tape (measure tape length with a ruler and keep it consistent).
Build the Three Bridge Shapes
- Measure and cut tape: Cut three equal pieces of tape, each 15 cm long. Set them aside—one piece per bridge.
- Triangle bridge:
- Fold the paper in half lengthwise, then unfold. You now have a center crease.
- From the center crease, fold each side toward the middle so the edges meet the crease, forming a narrow, tall “V” shape.
- Secure the two outer edges together with one piece of tape, creating a triangular cross‑section.
- Square bridge:
- Fold the paper in half widthwise, then unfold.
- Fold each side toward the center line, meeting at the middle, so the paper forms a flat, wide rectangle.
- Secure the two opposite edges together with one piece of tape, producing a square‑shaped tube.
- Arch bridge:
- Roll the paper tightly from one corner to the opposite corner, creating a diagonal tube (the roll should be about 1 cm in diameter).
- Shape the rolled tube into a gentle arch that spans the supports.
- Fasten the ends of the arch to the supports with the remaining piece of tape.
All bridges should sit flat on the supports before any weight is added. Adjust the tape placement if the bridge tilts.
Test the Bridges
- Place the first bridge (e.g., triangle) across the supports.
- Gradually add weight in the centre of the span, using one coin or washer at a time.
- After each addition, pause for 2–3 seconds to see if the bridge holds.</n
- When the bridge finally bends, tears, or collapses, note the total weight it supported.
- Record the result in the data table (see below).
- Remove the bridge, reset the supports, and repeat the same procedure for the square and arch shapes.
Perform at least three trials for each shape so you can calculate an average load.
What to Observe or Measure
- Load (grams): Add weights until failure; sum the mass of all items placed.
- Failure mode: Note whether the paper ripped, buckled, or the tape came loose.
- Deformation before failure: Sketch the bridge shape just before it gave way.
Variables and Controls
- Independent variable: Bridge shape (triangle, square, arch).
- Dependent variable: Maximum weight the bridge supports before failure.
- Controlled variables: Paper size and type, tape length, support distance, weight addition method, and ambient conditions (avoid windy drafts).
Data Table
| Shape | Trial 1 (g) | Trial 2 (g) | Trial 3 (g) | Average (g) |
|---|---|---|---|---|
| Triangle | ||||
| Square | ||||
| Arch |
Graphing Your Results (optional)
If you wish to visualise the data, create a simple bar graph: the horizontal axis lists the three shapes, and the vertical axis shows the average load (grams). Bars that are taller indicate stronger performance.
The Science Explained
Engineers favour triangles because a triangle is a *rigid* shape. When forces act on a triangle, the sides cannot change length without breaking a side, so the shape distributes load evenly. A square or rectangle can deform into a parallelogram unless it is reinforced, which makes it less able to carry weight. An arch also spreads load, but the paper roll used here is thin and tends to buckle under compression, so it usually supports less weight than a well‑formed triangular tube.
In terms of physics, the strength of a bridge depends on two main factors:
- Material strength: Paper resists tension (pulling) better than compression (pushing). Triangular geometry keeps most forces in tension along the edges.
- Geometric stability: A shape with internal angles that sum to 180° (like a triangle) cannot change shape without breaking a side, whereas a square can “shear” unless braced.
These principles explain why, in most classroom tests, the triangular bridge holds the most weight.
Troubleshooting
- Bridge collapses immediately: Check that the tape fully secures the edges; loose tape lets the shape open.
- Paper tears at the same spot each time: Reinforce that area by folding the paper once more before taping.
- Weight distribution feels uneven: Place the weight exactly at the centre of the span; use a small piece of cardboard as a platform to keep coins from sliding.
Try Another Version
Once you have identified the strongest shape, experiment with variations:
- Use two sheets of paper glued together to see how thickness affects strength.
- Replace tape with a small amount of glue (adult‑supervised) and compare results.
- Increase the span distance to 12 inches and observe how each shape’s performance changes.
Cleanup and Disposal
Collect all paper scraps and recycle them. Remove tape from the supports and store the tape for future projects. Coins and washers can be returned to a piggy bank.
Next Steps
Use what you learned about shape strength to design a longer bridge, a bridge that can hold a small toy car, or a bridge made from newspaper rolls. The same principles apply to real‑world engineering projects.
Related terms
- Rigidity
- The ability of a shape to keep its form when forces are applied.
- Compression
- A force that squeezes or pushes material together.
- Tension
- A force that pulls or stretches material.