Overview
Straw instruments are a classic classroom and home activity because they turn a simple drinking straw into a miniature double‑reed woodwind. The most important part of the instrument is the reed—the thin, triangular piece cut from the end of the straw that vibrates when you blow. While many tutorials only ask you to cut a triangle, the angle of the cut sides also matters. This demonstration lets children compare three reeds with different cut angles and listen to how the sound quality changes.
Before you begin
- Choose a well‑ventilated area and a flat work surface.
- Adult supervision is required for using scissors and for handling sharp straw edges.
- Make sure the straws are clean and free of any plastic coating that could melt when blown hard.
- Explain to children that the activity is about listening, not about producing a perfect musical note.
Materials
- 4–5 standard plastic drinking straws (about 20 cm long each). Using the same brand ensures consistent thickness.
- Sharp scissors.
- Ruler or measuring tape.
- Permanent marker (optional, for labeling).
- Paper towel or small cloth for cleaning the straw ends.
Steps
- Prepare the straw body. Cut one straw to a length of 15 cm. This will be the “oboe body” for all three reeds. Mark the cut end with a dot; this is where the reed will be attached.
- Mark the reed positions. On three fresh straws, measure 2 cm from one end and make a faint pencil line. These will become the three reeds.
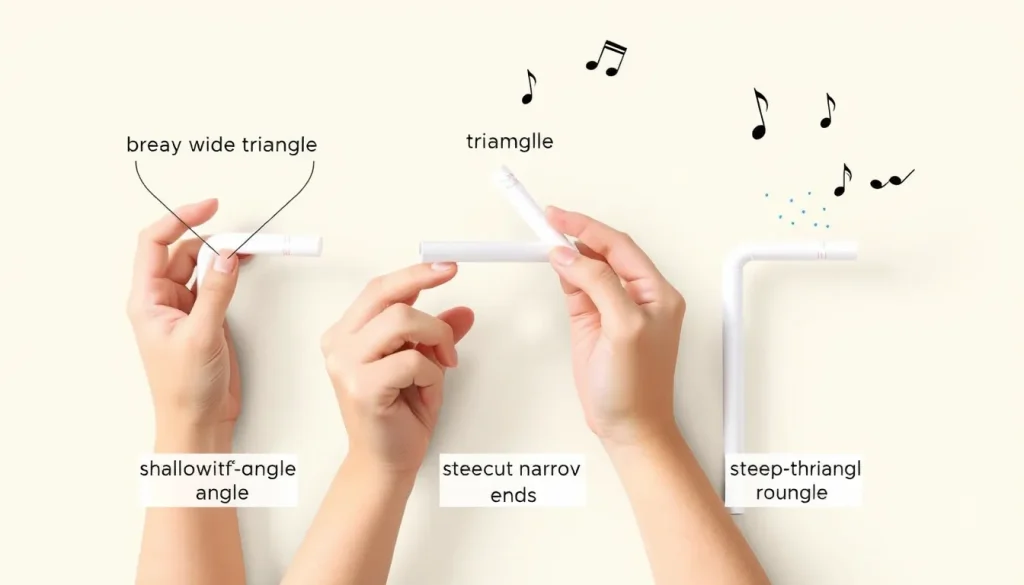
- Cut a shallow‑angle reed. Hold the straw so the marked end faces you. Using the scissors, make two cuts that meet at a point, but keep each cut only about 5° off the straw’s axis (a very gentle slope). The resulting triangle is wide and the sides are almost parallel to the straw’s length.
(See the Yamaha experiment for the basic triangle cut [1].) - Cut a medium‑angle reed. Repeat the same process, but this time angle each cut about 15° from the axis. The triangle will be narrower and the sides steeper.
- Cut a steep‑angle reed. Make the cuts at roughly 30° from the axis. The triangle becomes sharp and the reed tip is thin.
(The “Straw Reed Instrument” guide shows angled cuts as a key design step [2].) - Flatten the base (optional but helpful). Gently press the very tip of each reed with your thumb to make the tip slightly rounded. This helps the two sides vibrate against each other.
- Attach the reed. Insert the cut end of the reed into the marked dot on the 15 cm straw body. Push just far enough that the reed tip sticks out about 5 mm; too deep a insertion will mute the sound.
- Test each reed. Blow steadily into the open end of the straw body. Listen for the first clear tone, then try to hold a steady pitch for a few seconds. Record what you hear (see “What to observe” below). Repeat for the medium and steep reeds, re‑inserting each one in the same position.
- Compare the sounds. Play the three reeds in order (shallow → medium → steep) and discuss which sounded louder, clearer, or easier to control.
What to observe
Ask children to note the following for each reed:
- Pitch stability: Can they keep a single note without the pitch wobbling?
- Loudness (volume): Which reed produces the strongest sound with the same breath effort?
- Timbre (tone colour): Does the sound feel bright, buzzy, or mellow?
- Ease of start: How many breaths does it take before a clear tone appears?
Write observations in a simple table (optional):
| Reed angle | Pitch stability | Volume | Timbre | Ease of start |
|---|---|---|---|---|
| Shallow (~5°) | ||||
| Medium (~15°) | ||||
| Steep (~30°) |
The science explained
In a double‑reed instrument, the vibrating element is the tip of the reed. When you blow, the air pressure forces the two thin sides of the cut to open and close rapidly, chopping the airflow and creating a sound wave inside the tube. The frequency (pitch) of that wave is mainly set by the length of the tube, but the reed itself determines how efficiently the vibration is generated and how much of the sound can escape.
Changing the cut angle changes two physical properties:
- Stiffness of the tip. A shallow angle leaves a broader, thicker tip that is more flexible. It bends easily, so a small breath can start the vibration, but the larger surface also dampens the motion, often resulting in a softer, less focused tone.
- Opening size. A steeper angle makes a narrow tip that is stiffer. It requires a slightly stronger breath to open, but once vibrating it creates a sharper, louder pulse because the airflow is more abruptly interrupted. This tends to produce a brighter timbre and better pitch stability.
These effects are consistent with the observations reported by Yamaha’s straw‑reed experiment, which found that “the straw reed will make a sound when placed into the mouth and blown through with force,” but “no sound is produced when the triangle‑cut base of the reed is flattened” [1]. In other words, the geometry of the cut directly controls whether the reed can vibrate effectively.
The “Straw Reed Instrument” article further explains that the straw acts as a closed cylindrical resonator, and the reed supplies many possible frequencies, of which those matching the tube’s resonance are amplified [2]. By altering the reed angle, you change how strongly each possible frequency is excited, which is why the audible tone changes.
Troubleshooting
- No sound at all. Check that the reed tip is not flattened completely; a rounded tip should still have a clear edge. Also verify that the reed is inserted the correct depth (about 5 mm protruding).
- Pitch wobbles wildly. The reed may be too shallow (too flexible) or the insertion depth is inconsistent. Try a slightly steeper cut or adjust the insertion depth by a millimeter.
- Very quiet sound. The reed tip may be too thick (shallow angle) or the straw body is too short. Use the medium or steep reed, and ensure you are blowing steadily rather than in short bursts.
- Sharp squeak instead of a musical tone. The reed tip might be too steep, making it overly stiff. Lightly round the tip with your thumb to soften the vibration.
Next steps
Once the basic comparison is clear, children can extend the investigation by:
- Changing the length of the straw body to see how pitch shifts with tube length (the classic “slide” method).
- Using straws of different diameters to explore how tube diameter interacts with reed angle.
- Recording the sounds with a smartphone and comparing waveforms in a free audio‑analysis app.
- Designing a “slide straw” that can be lengthened while keeping the same reed, turning the activity into a simple engineering challenge.
These extensions deepen the link between geometry, vibration, and acoustic resonance, reinforcing core physics concepts while keeping the activity hands‑on and fun.
Frequently asked questions
Do I need a specific type of straw?
Any standard plastic drinking straw works, but use the same brand for all three reeds so thickness and stiffness are consistent.
Can I use a metal or wooden reed instead of a straw?
The demonstration relies on the straw’s flexibility and easy cutting. Metal or wood reeds require tools and safety measures beyond the scope of this activity.
Related terms
- Reed
- A thin piece of material that vibrates when air passes over it, producing sound in woodwind instruments.
- Resonance
- The condition where a system naturally vibrates at certain frequencies, amplifying those sounds.
- Frequency
- The number of sound‑wave cycles per second, perceived as pitch.
- Double reed
- Two matching reeds tied together; the vibration of both sides creates the sound, as in oboes and bassoons.
Sources & references
- Yamaha Corporation – "[Experiment] Try making a reed out of a straw" https://www.yamaha.com/en/musical_instrument_guide/oboe/mechanism/mechanism003.html
- American Institute of Physics – "Straw Reed Instrument" https://students.aip.org/observer/straw-reed-instrument
- West Virginia University Extension – "Straw Oboe" https://extension.wvu.edu/youth-family/youth-family-learning-activities/straw-oboe