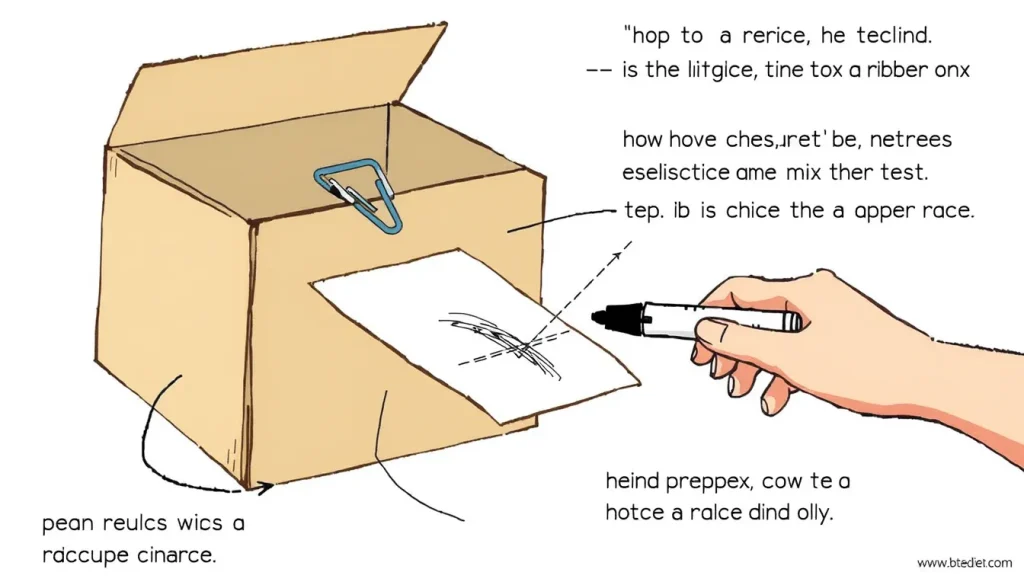
A seismometer is an instrument that senses the tiny up‑and‑down movements of the Earth’s surface. By turning those movements into a visible trace, students can watch how traffic, footsteps, or distant earthquakes shake the ground. The design described here uses only common household supplies, so families can build a working device in a single afternoon.
Overview
This activity is a demonstration rather than a formal experiment: it shows the principle that a mass tends to stay still while the ground moves beneath it. The resulting motion of a lightweight paper strip is recorded with a simple marker. Children will be able to compare different sources of vibration, measure the length of each trace, and discuss why some motions are larger than others.
Before you begin
- Workspace: Use a sturdy table or desk that will not wobble during construction. A flat, quiet room reduces background vibrations that could obscure the results.
- Adult supervision: The activity involves scissors, glue, and small metal objects (e.g., a paper clip used as a weight). An adult should handle any sharp tools and ensure the final device is stable.
- Timing: The build takes about 20–30 minutes; observation can continue for several hours or days, depending on how often you check the trace.
Materials
All items are inexpensive and can be found around the house or school. The list follows the recommendations of the U.S. Geological Survey and Canterbury University tutorials.
- Medium‑sized cardboard box with a removable lid (e.g., a shoe‑box) – serves as the base housing.
- Blank paper or lightweight cardstock (A4 or Letter size) – will become the moving strip.
- Rubber bands or strong thread – act as the restoring “spring” for the mass.
- Heavy paper clip or small metal washer – provides the inertial mass.
- Permanent marker (fine tip) – draws the trace on the paper.
- Ruler (15 cm or longer) – to align the paper and to measure trace length.
- Glue (school‑glue or hot‑glue) and clear tape – for assembling the frame.
- Scissors.
- Optional: a small piece of cardboard or a plastic cup to protect the marker tip.
Step‑by‑step construction
- Prepare the box lid. Turn the lid upside down and draw a rectangular opening about 3 cm inside the edge on all four sides (see Fig. 1). Cut the opening with scissors; this will be the window through which the paper strip moves.
- Create the paper feeder. Cut the blank paper into a long strip about 10 cm wide. Overlap the ends and glue them together to make a continuous loop that is at least 1 m long. This loop will run continuously under the marker.
- Attach the feeder slots. On opposite sides of the lid, measure and cut two parallel slots about 12 cm wide (slightly wider than the paper strip) and align them with the centre line of the lid. These slots guide the paper loop into and out of the box.
- Mount the mass. Tie a rubber band to the centre of the paper strip. Attach the other end of the rubber band to the metal paper clip, forming a simple spring‑mass system. The paper clip should hang just below the lid when the box is upright.
- Secure the marker. Tape the marker tip to the inside of the lid so that the tip lightly touches the paper strip as it passes. The marker should be positioned so that it does not press the paper down; a small piece of cardboard can be used as a spacer.
- Assemble the device. Place the lid (with the marker attached) on top of the box base, aligning the feeder slots with the openings you cut earlier. Feed the paper loop through the slots so that it runs continuously beneath the marker.
- Test the motion. Gently tap the box side. The paper clip (mass) will stay relatively still while the box moves, causing the paper strip to slide under the marker and leave a short line. Adjust the rubber‑band tension if the trace is too faint or if the paper jams.
- Start recording. Leave the device undisturbed on a flat surface. Over the next minutes or hours, any ground vibration – a footstep, a passing car, or a distant tremor – will generate a trace on the paper. Replace the paper when it is filled.
What to observe and how to record
Use the table below to log each distinct trace. Record the time (to the nearest minute), a brief description of the likely source (e.g., “door slammed”, “truck passed 50 m away”), and the length of the line measured with a ruler (centimetres). Children can also sketch the shape of the line to notice whether it is a single spike or a wavy pattern.
| Date | Time | Event (guess) | Trace length (cm) | Notes / Sketch |
|---|---|---|---|---|
After a day of observation, compare the longest traces with the events you suspect caused them. Discuss why a heavy truck creates a longer line than a child’s footstep.
The science behind the seismometer
Real seismometers work on the same principle as this model: a mass (the paper clip) is attached to a spring (the rubber band). When the ground moves, the mass tends to stay in place because of inertia. The relative motion between the ground and the mass is transferred to a recording element – in our case, a piece of paper that slides under a marker.
Seismic waves travel through the Earth as compressional (P‑waves) and shear (S‑waves). They cause the ground to move up and down, side to side, or both. The amplitude of those motions can be as small as a few micrometres, far below what we can feel, but a simple mechanical system can amplify the motion enough to leave a visible trace.
Key concepts to discuss with learners:
- Inertia: the tendency of an object to resist changes in motion. The paper clip stays still while the box moves.
- Restoring force: the rubber band pulls the mass back toward its equilibrium position, similar to a spring in a professional seismometer.
- Frequency: rapid vibrations produce many short spikes; slower, larger movements produce longer, smoother lines.
- Amplitude: the height of the trace corresponds to how much the ground moved.
Because the device is simple, it cannot measure precise magnitudes or differentiate between P‑ and S‑waves, but it faithfully demonstrates the core idea that ground motion can be recorded.
Troubleshooting
- No trace appears. Check that the marker tip actually touches the paper. If the tip is too high, lift the paper slightly or add a spacer.
- Paper jams in the slots. Ensure the slots are slightly wider than the paper strip and that the strip is smooth (no folds).
- Trace is too faint. Increase the rubber‑band tension so the mass moves more relative to the box, or use a darker marker.
- Excessive background lines. Place the box on a heavy, stable table or a stack of books to dampen ambient vibrations.
Try another version
For older students (12‑14 yr) who want a more quantitative device, replace the marker‑and‑paper system with a simple Arduino‑compatible accelerometer and a computer spreadsheet. The basic mass‑spring principle stays the same, but the data can be plotted digitally and compared with online earthquake catalogs.
Classroom adaptation
When used with a group, assign roles such as:
- Builder: assembles the seismometer.
- Observer: watches the trace and fills in the log.
- Data analyst: measures trace lengths and creates a bar graph of source vs. amplitude.
- Presenter: explains the physics to the class.
Rotate the roles so each child experiences construction, observation, and analysis. The activity aligns with the “Forces & Motion” and “Sound & Vibration” curriculum strands.
Cleanup and storage
When the observation period ends, carefully unwind the paper loop and store it in a zip‑lock bag to keep it flat. The cardboard box can be reused for future projects; keep the rubber bands and marker in a labeled container.
FAQ
Can this homemade seismometer detect real earthquakes?
Yes, it can record the ground motion from moderate to large earthquakes that travel to your location, but the trace will be faint compared with nearby vibrations. For very distant events the motion may be too small to see without a more sensitive sensor.
How can I make the trace longer or clearer?
Increase the tension of the rubber band (stronger restoring force) or use a heavier mass such as a small metal washer. A darker, thicker‑tip marker also leaves a more visible line.
Related terms
- Seismometer
- An instrument that measures the motion of the Earth’s surface, usually by recording the relative movement between a mass and the ground.
- Seismic wave
- Energy that travels through the Earth after an earthquake, causing the ground to move in different ways.
- Amplitude
- The size of a vibration; larger amplitudes produce longer traces on the paper.
- Frequency
- How many vibrations occur per unit of time; high‑frequency motions make many short spikes, low‑frequency motions make longer, smoother lines.
- Inertia
- The tendency of an object to keep moving at the same speed unless acted on by a force; it keeps the mass in the seismometer relatively still while the box moves.
Sources & references
- U.S. Geological Survey, “How can I make my own seismometer?” https://www.usgs.gov/faqs/how-can-i-make-my-own-seismometer
- University of Canterbury, “Make your own seismometer” https://www.canterbury.ac.nz/study/academic-study/science/science-outreach-for-schools/learning-resources/learn-from-home/make-your-own-seismometer
- Incorporated Research Institutions for Seismology, “Build Your Own Seismograph – Tutorial Part 1/5” https://www.iris.edu/hq/inclass/video/build_your_own_seismograph_tutorial__part_15
- Science Buddies, “Make Your Own Seismograph” https://www.sciencebuddies.org/stem-activities/make-a-seismograph